Gluten-Free Bread – Soft Gluten-Free Bread (Detailed Recipe)
Introduction
Making soft gluten-free bread at home can be challenging because gluten, the protein found in wheat, is responsible for the elasticity and structure of traditional bread. This recipe uses a carefully balanced blend of gluten-free flours, starches, and binders to create a loaf that is soft, tender, and suitable for sandwiches, toast, or everyday eating.
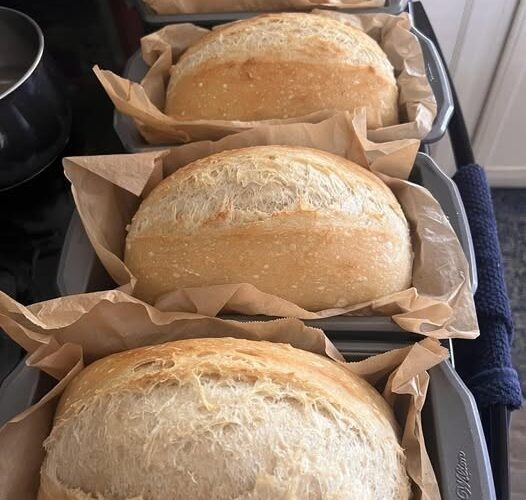
The finished bread has a light crumb, a golden crust, and remains soft for several days when stored properly.
Recipe Information
- Yield: 1 large loaf (10–12 slices)
- Preparation Time: 25 minutes
- Rising Time: 45–60 minutes
- Baking Time: 45–50 minutes
- Total Time: Approximately 2 hours
Equipment
- 9 x 5-inch (23 x 13 cm) loaf pan
- Large mixing bowl
- Stand mixer or hand mixer
- Measuring cups and spoons
- Kitchen scale (recommended)
- Rubber spatula
- Cooling rack
- Plastic wrap or clean kitchen towel
Ingredients
Dry Ingredients
- 2 cups (280 g) gluten-free all-purpose flour blend
- 1 cup (120 g) brown rice flour
- ½ cup (75 g) tapioca starch
- ¼ cup (30 g) potato starch
- 2 tablespoons psyllium husk powder
- 2 teaspoons xanthan gum
- 1½ teaspoons salt
- 2 tablespoons granulated sugar
Yeast Mixture
- 2¼ teaspoons active dry yeast (1 packet)
- 1 tablespoon sugar
- ½ cup (120 ml) warm water (105–110°F / 40–43°C)
Wet Ingredients
- 1¼ cups (300 ml) warm milk
- 2 large eggs, room temperature
- ¼ cup (60 ml) vegetable oil
- 1 teaspoon apple cider vinegar
- 1 teaspoon honey
Understanding the Ingredients
Gluten-Free Flour Blend
Provides the main structure of the bread.
Brown Rice Flour
Adds body and a mild flavor.
Tapioca Starch
Creates softness and elasticity.
Potato Starch
Improves moisture retention.
Psyllium Husk
Acts as a gluten replacement and helps create a flexible crumb.
Xanthan Gum
Provides additional binding and prevents crumbling.
Apple Cider Vinegar
Helps strengthen the dough and improve rise.
Step 1: Activate the Yeast
In a small bowl combine:
- Warm water
- 1 tablespoon sugar
- Active dry yeast
Stir gently.
Let sit for 5–10 minutes.
The mixture should become foamy and bubbly.
If it does not foam, start again with fresh yeast.
Step 2: Prepare the Dry Ingredients
In a large bowl whisk together:
- Gluten-free flour blend
- Brown rice flour
- Tapioca starch
- Potato starch
- Psyllium husk powder
- Xanthan gum
- Salt
- Sugar
Mix thoroughly to ensure even distribution.
Step 3: Combine Wet Ingredients
In another bowl whisk together:
- Warm milk
- Eggs
- Vegetable oil
- Apple cider vinegar
- Honey
Whisk until smooth.
Add the activated yeast mixture.
Mix again.
Step 4: Make the Dough
Pour the wet ingredients into the dry ingredients.
Mix using a stand mixer with a paddle attachment on medium speed for 4–5 minutes.
Unlike wheat bread dough, gluten-free dough resembles a very thick batter rather than a kneadable dough.
Continue mixing until completely smooth.
The psyllium husk will gradually absorb moisture and thicken the mixture.
Step 5: Prepare the Pan
Grease the loaf pan thoroughly.
Line with parchment paper if desired.
Transfer the dough into the pan.
Use a damp spatula to smooth the surface.
Shape into a gentle dome.
Step 6: First and Only Rise
Cover loosely with plastic wrap or a kitchen towel.
Place in a warm draft-free location.
Allow to rise for 45–60 minutes.
The dough should increase noticeably in size and rise near the top of the pan.
Because gluten-free dough lacks gluten structure, over-proofing can cause collapse, so do not let it rise excessively.
Step 7: Preheat the Oven
Near the end of the rise, preheat the oven to:
- 375°F (190°C)
Position the rack in the center of the oven.
Step 8: Bake the Bread
Place the loaf pan into the preheated oven.
Bake for 45–50 minutes.
The loaf should develop:
- A deep golden-brown crust
- A firm top
- A hollow sound when tapped
For accuracy, the internal temperature should reach approximately 205–210°F (96–99°C).
Step 9: Protect the Crust if Necessary
If the loaf browns too quickly during baking, loosely tent it with aluminum foil during the final 15–20 minutes.
This prevents excessive darkening while allowing the interior to finish baking.
Step 10: Remove from Pan
Remove the bread from the oven.
Let it cool in the pan for 10 minutes.
Carefully lift it out and transfer it to a cooling rack.
Step 11: Cool Completely
Allow the bread to cool for at least 2 hours before slicing.
This step is crucial.
The crumb continues to set during cooling.
Cutting too early can result in a gummy texture.
Serving Suggestions
This bread works well for:
- Sandwiches
- Toast
- French toast
- Garlic bread
- Breakfast toast with jam
- Grilled cheese sandwiches
Optional Add-Ins
Herb Bread
Add:
- 1 teaspoon dried rosemary
- 1 teaspoon dried thyme
Seeded Bread
Add:
- 2 tablespoons sunflower seeds
- 2 tablespoons pumpkin seeds
- 1 tablespoon sesame seeds
Oat Bread
Add:
- ½ cup certified gluten-free oats
Honey Bread
Increase honey to 2 tablespoons for a slightly sweeter loaf.
Storage
Room Temperature
Store in an airtight container for up to 3 days.
Refrigerator
Store for up to 1 week.
Freezer
Slice before freezing.
Wrap tightly and freeze for up to 3 months.
Toast directly from frozen.
Troubleshooting
Bread Is Dense
Possible causes:
- Old yeast
- Insufficient rise time
- Too much flour
Bread Is Gummy
Possible causes:
- Underbaking
- Slicing before cooling
Bread Collapsed
Possible causes:
- Over-proofing
- Excess liquid
Bread Is Dry
Possible causes:
- Too much flour
- Overbaking
Tips for Extra Soft Bread
- Weigh ingredients whenever possible.
- Use room-temperature eggs.
- Do not skip the psyllium husk.
- Avoid over-proofing.
- Cool completely before slicing.
- Store in an airtight container immediately after cooling.
- Toast slices lightly before serving.
- Add 1 tablespoon of olive oil for extra tenderness.
- Use fresh yeast for the best rise.
- Measure flour accurately to maintain proper hydration.
The finished loaf should be soft, flexible, moist, and sturdy enough for sandwiches while remaining entirely gluten-free, making it an excellent everyday bread for those avoiding wheat and gluten.
