🟡 Introduction
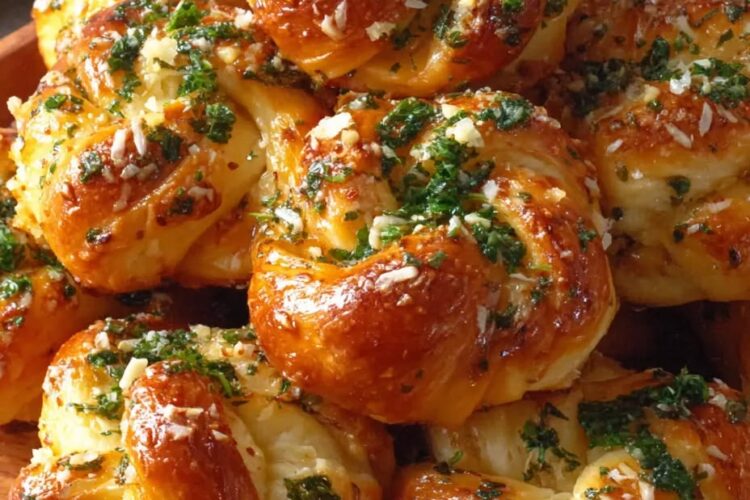
Sourdough Garlic Knots are a delicious twist on classic garlic bread. Made from naturally fermented dough, they offer a slightly tangy flavor, chewy interior, and golden crust—all coated in buttery garlic goodness.
They’re perfect for:
- Serving with pasta or pizza
- Party appetizers
- Snack platters
- Dipping in sauces
🌟 Why This Recipe Works
- Sourdough fermentation adds depth and texture
- Soft enriched dough creates tender knots
- Garlic butter coating enhances flavor
- Proper shaping and proofing ensures light, airy texture
🛒 Ingredients
For the Dough:
- 400g bread flour
- 100g active sourdough starter (fed and bubbly)
- 220ml water (room temperature)
- 30ml olive oil
- 8g salt
- 10g sugar (optional, for softer texture)
For Garlic Butter:
- 60g unsalted butter (melted)
- 4–5 cloves garlic (minced)
- 1 tablespoon chopped parsley
- ½ teaspoon salt
Optional Toppings:
- Grated Parmesan cheese
- Chili flakes
🧰 Equipment Needed
- Mixing bowl
- Dough scraper
- Baking tray
- Parchment paper
- Brush for butter
🧪 Understanding the Starter
Your starter should be:
- Active and bubbly
- Fed 4–6 hours before use
- Slightly domed and airy
This ensures proper rise and fluffy knots.
🥣 Step 1: Mix the Dough
In a large bowl:
- Combine water and sourdough starter
- Stir until dissolved
Add flour, salt, and sugar:
- Mix until rough dough forms
Add olive oil:
- Mix until incorporated
✋ Step 2: Knead the Dough
- Knead for 8–10 minutes
Goal:
- Smooth and elastic dough
- Slightly soft but not sticky
⏳ Step 3: Bulk Fermentation
- Cover and let rise at room temperature for 4–6 hours
Optional:
- Perform stretch-and-fold every hour
Dough should:
- Increase in size
- Feel airy
❄️ Step 4: Cold Fermentation (Optional)
- Refrigerate overnight (8–12 hours)
Benefits:
- Better flavor
- Easier shaping
🔪 Step 5: Divide the Dough
- Divide into 12–16 equal pieces
Roll each into a rope about 15–20 cm long.
🔄 Step 6: Shape Knots
- Tie each rope into a loose knot
- Tuck ends underneath
⏳ Step 7: Final Proof
- Place knots on lined tray
- Cover and let rise for 1–2 hours
They should:
- Puff up slightly
🔥 Step 8: Preheat Oven
- Preheat to 200°C (400°F)
🔥 Step 9: Bake
- Bake for 15–20 minutes
Until:
- Golden brown
- Lightly crisp outside
🧄 Step 10: Prepare Garlic Butter
While baking:
- Melt butter
- Add garlic, parsley, and salt
- Mix well
🧈 Step 11: Coat the Knots
- Remove knots from oven
- Brush generously with garlic butter
Optional:
- Sprinkle Parmesan or chili flakes
⏳ Step 12: Serve Warm
Best served fresh and warm.
🍽️ Serving Suggestions
- With marinara sauce
- Alongside pasta
- With soups or salads
🔄 Variations
1. Cheesy Knots
- Add cheese inside dough
2. Herb Knots
- Add mixed herbs
3. Spicy Knots
- Add chili flakes
🧠 Expert Tips
- Use active starter
- Don’t overproof
- Shape evenly
- Brush butter while hot
- Bake until golden
❌ Common Mistakes
- Weak starter
- Overproofing
- Dense dough
- Not enough seasoning
- Underbaking
🥗 Nutritional Overview
- Calories: 120–180 per knot
- Carbs: Moderate
- Fat: Moderate
🧊 Storage
Room Temperature:
- 1–2 days
Refrigeration:
- Up to 4 days
Freezing:
- Up to 2 months
- months
🔥 Reheating
- Oven for crispiness
- Microwave for softness
🍱 Meal Prep Tips
- Make dough ahead
- Freeze shaped knots
🌟 Texture Guide
- Perfect: soft inside, crisp outside
- Dense: underproofed
- Flat: overproofed
🍴 Presentation Tips
- Brush evenly
- Add garnish
- Serve warm
